Wrangle Your Kit
Starting out? Keep it simple and solid.
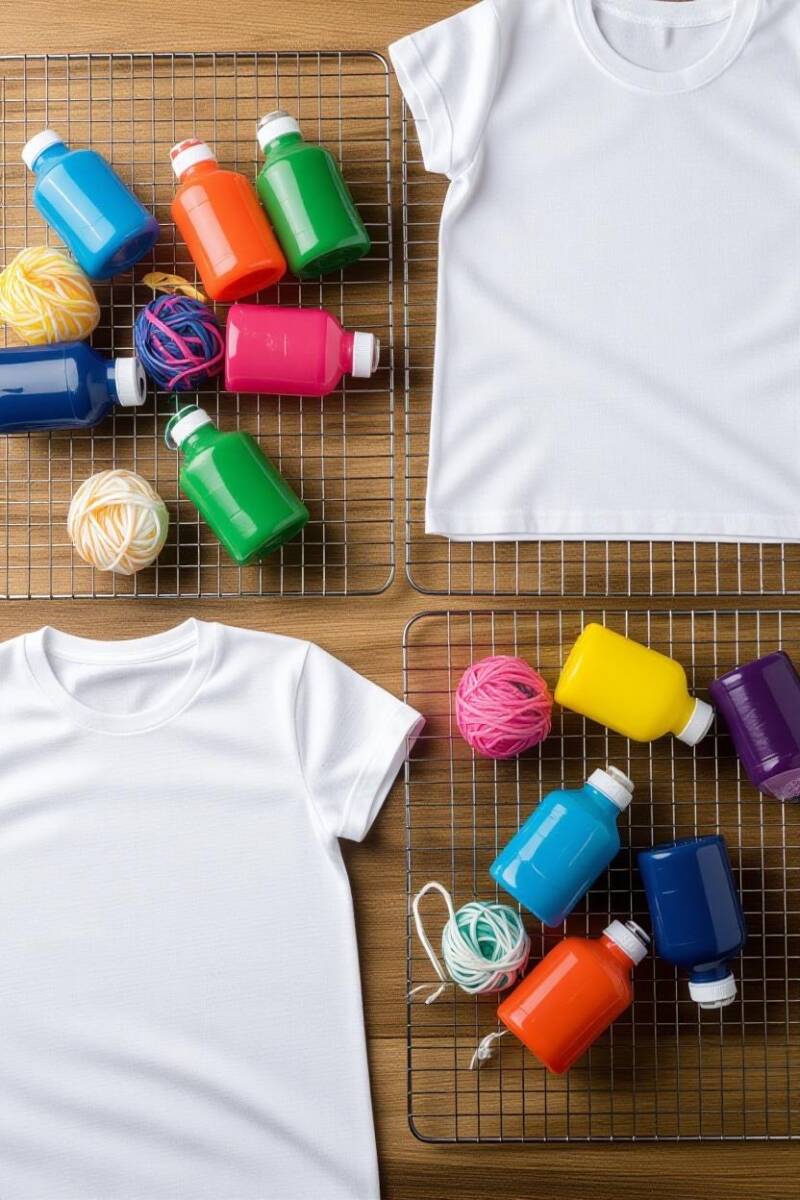
Grab a 100% white cotton product—no blends, no shortcuts.
Snatch some rubber bands to rope off a wild pattern.
Steadily aim loaded up your dye bottles, don’t get sloppy.
Dye it on a baker’s cooling rack sitting atop a trash bag to catch the mess.
Stash the finished piece in a plastic shopping bag to let it cure.
Mind the little details about your gear.
The Gear
What to look for.
What to avoid.
The Bags
The cure bag’s where the magic happens—keeps things warm and damp so the dye sets right. Make sure it’s big enough for the rack and fabric, without touching bottom. Pooling dye down there and/or holes? That’s trouble waitin’ to happen.
If you want your masterpiece to cure right and your workspace to stay clean, make sure that bag’s solid—no holes, no leaks. It should be roomy enough to close without bunchin’ up top, and stiff enough to hover over your work without saggin’.
The Binds
Anything that holds fabric in place—that’s a bind. Could be loose like a handshake or locked down like a vice, all depends on the look you’re after. Rubber bands, string, clips, sinew, even medical hemostats… if it grips, it binds.
Avoid binders with teeth or rust—unless you’re aiming for chaos and a tear in your masterpiece. That 20-year-old chrome binder from the office? It might hold paper, but it'll shred fabric like a coyote in a chicken coop. Think twice before going rogue.
The Bottles
Leak-proof bottles are your best friend if you want flow without the mess. Look for ones that taper up top, with a nozzle cap and a pressure barrier—so you control the stream with your hand, not hope and prayer.
Wide-brim bottles with fat tips—like the ones restaurants use for sour cream—ain’t gonna cut it. Unless you’re chasing puddles and chaos, steer clear. Those things’ll drown your work faster than a flash flood in July.
The Dyes
Stick to dyes that play nice with water—no fancy chemical cocktails, just the basics. If you're feelin' bold, grab the powdered kind. They're like a Jello box: just add water and let the magic happen. Simple, clean, no surprises.
If you're livin' out in the sticks on a septic system, steer clear of dyes that'll murder the good bugs in your tank. Still tempted to go chemical? Better keep your septic guy on speed dial—you're gonna need him sooner than you think.
The Fabrics
Cotton, linen, hemp, bamboo—natural stuff’s your best bet. These fabrics soak up dye like desert soil after a rare rain. Keep it 100% natural if you want your colors to stick and pop.
Polyester and synthetics might be cheap and flashy, but they don’t play nice with dye. You’ll need chemical tricks just to make the color stick. Stick with natural fibers and keep it earth-friendly—no shortcuts, no nonsense.
The Racks
Stiff metal racks are a dyer’s best ally. They oughta sit high enough to dodge puddles and tough enough to hold a 3-pound shirt—think baker’s rack built for a loaf that fights back. Make sure they’re coated, unless you like rust stains with your work.
Racks that sit just a hair off the surface can make magic—if you know what you’re doing. Beginners? Steer clear unless you enjoy accidental art. Whatever rack you use, check for bare metal or rust spots unless you want your colors kissed by corrosion.
The Surface
Whatever surface you’re workin’ on should be clean, washable, and not thirsty for dye. If it’s the dining table, lay down plastic—unless you’re lookin’ to tie-dye the furniture too. A cheap painter’s cloth or a well-placed trash bag’ll do just fine.
Skip the towels—too much liquid and the dye’ll bleed right through. And if you’re workin’ on stone or melamine, make sure the surface ain’t worn or pitted, unless you want your colors wanderin’ off course and to hear about it later.